When the Boston Comics Roundtable received the copies of one of its books from the printers, the books’ spines had an annoying habit of popping up in the middle two pages. In retrospect, we’d probably pushed out luck in making a 72-page book saddle-stitched (a.k.a. staple bound). You can only fold so many pieces of paper and expect it to lie flat. But I’ve seen this same problem plenty of times with homemade comics.
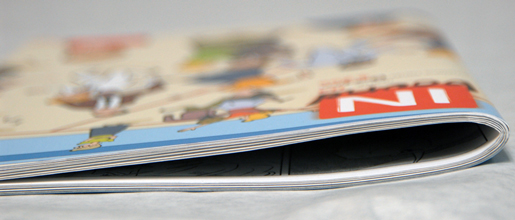
The guiding principle in this project was to build it as cheaply as possible. In the same spirit, you should feel free to replace materials as you see fit, and as you can find them.
Total cost for the version detailed below: $67.87 (in 2011 dollars). It could conceivably cost millions by the time you read this.
I’m sure you can do better if you can shop at a big box store rather than pricier, independently-owned city stores (much as I love local business).
Preface
This particular book press was designed to fit the maximum number of books simultaneously, two stacks at a time. If you don’t need or want to flatten quite so many books, you can easily truncate the length of the planks and use only four bolts.
Materials
- Two (2) lengths of 2″ x 8″ oak board, about 3.5′ to 4′ in length (approx $25-40)
- This is the most important item. Because the wood will be taking a lot of stress, you should avoid softwoods like pine, despite the temptingly cheaper price. If you can’t find oak, try beech, ash, maple, or cherry
- Two (2) piece of scrap wood about half to two-thirds the length of the oak board (free, hopefully)If you’re resourceful, you can find these lying aroundSix (6) carriage bolts, 10″ to 12″ in length (approx $2-3)
- Six (6) wingnuts with threads to match the carriage bolts (approx $1-2)
- Twelve (12) washers that match with width of the carriage bolts (approx $1)
- Four (4) 8-10″ mending plates or similar flat plate (approx $1-4)
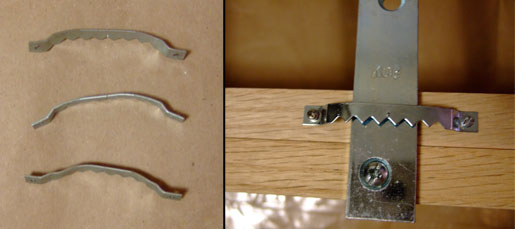
- Four (4) saw tooth picture ring hangers (approx $1-5)
- This can be substituted with a number of things. Scroll down the page to see how they come into play, then use your imagination. The important thing is that they exceed the width of the mending plates
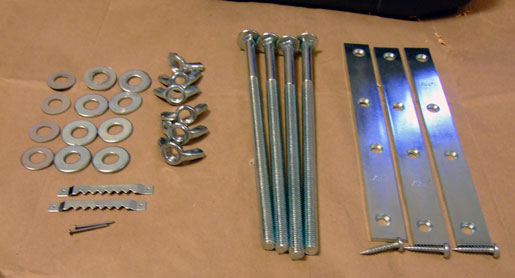
Note: The actual number of items in the picture above is inaccurate. You’ll need more of each of these things. READ THE LIST OF MATERIALS. The picture is merely illustrative what the items look like: washers, picture hangers, nails, wing nuts, carriage bolts, mending plates, and screws (L to R).
You’ll also need a few tools:
- Drill
- Wood clamps
- Hammer
Before leaving the store
Take the two planks of hardwood and lay them flat against each other. Make sure they are indeed flat. If the wood is warped, it’s not going to do much good as a book press. Also, make sure you have the correct drill bits to match the width of the carriage bolts. A good hardware store employee should be able to offer suggestions for alternative materials if you can’t find exactly what you need.
Setting up the planks
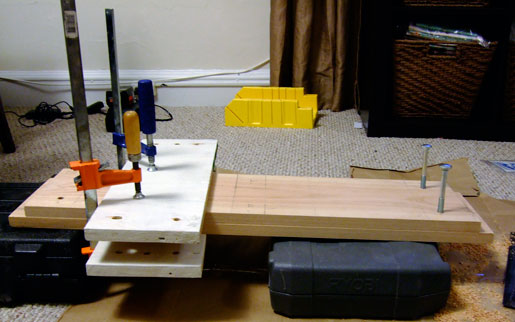
Arrange the two planks of hardwood so that the edges line up, width-wise. As you can see from the photos here, the lengths of my book press don’t quite match up. That didn’t matter to me, since I was building for function first, aesthetics after.
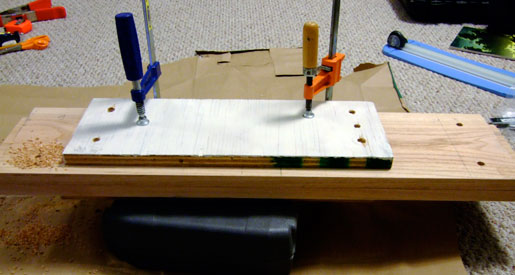
Then place your scrap wood planks above and below the hardwood. These provide a padding for the wood clamps so you don’t dent your nice oak. Place the scrap wood roughly in the center of the oak. Then clamp down to hold them all in place.
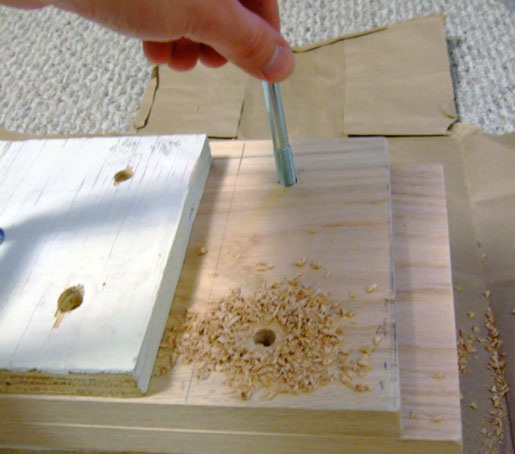
Check the width of the holes. The carriage bolts should be able to smoothly pass through both planks.
Assembling
Once the six holes are drilled, place the carriage bolts, washers, and nuts in each hole. You should have a washer on both the top, between the nut and the wood, and the bottom, between the bolt head and the wood. The purpose of a washer is to distribute some of the pressure across a larger area of the wood.
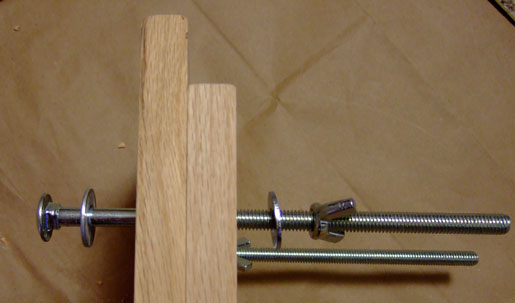
To begin, take the side of the bottom oak plank (the one with in contact with the head of the carriage bolt). Measure the distance between the one of the side bolts and one of the center bolts. Make a pencil mark at roughly 1/3rd the distance and 2/3rds the distance. The exact spacing is not crucial.
HINT – if you plan on using this for the same size book every time, you might want to grab one of those books at this point. Make sure that the rails will be in contact with the spine of your book. If you plan on pressing several different sizes of books, you could add three or four guard rails spaced more closely together to hedge your bets.
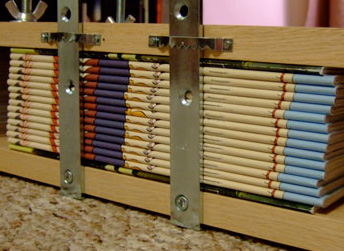
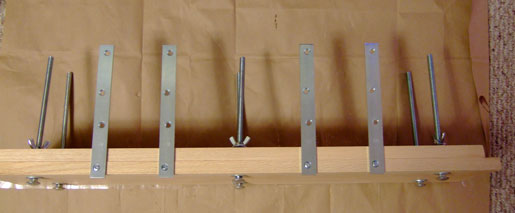
Now we need to fashion some little sleeves along the top plank for mending plates to slip into. The sleeves are needed to keep the plates from swiveling all over the place. But because they’re completely unattached to the mending plates, you’ll be able to lift off the top half of the finished book press whenever you need to.
The sleeves won’t bear any real weight, so I got creative at the hardware store and opted for an inexpensive set of picture hanger hardware (sometimes referred to as “saw tooth ring hangers” or “frame backs”). But because the rise in them was a little low, I bent them with a pair of pliers until they could accommodate the guard rails.
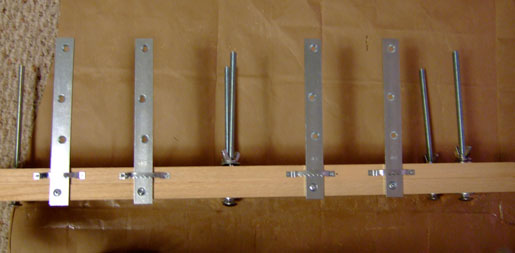
difficulty and come cleanly away from the bottom portion. If it doesn’t, you may want to make larger holes for the carriage bolts to pass through.
If everything worked smoothly, you’re ready for a test drive.
Test ‘er out
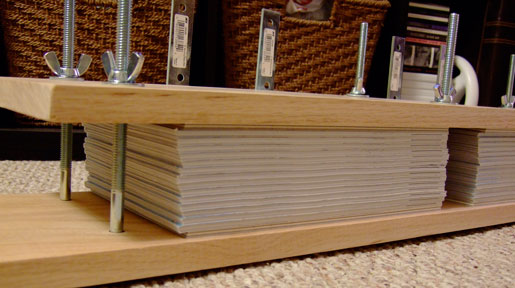
As I said before, with this particular design, I wanted to get as many books in as possible, so I built it to accommodate two stacks of books at the same time. The only tricky part of this design is that the columns will always need to have an equal number of books in them at any given time.
Start out with a small stack of books in each side. Line the spines up against the guard rails. If you need to, tip the book press back so the books fall into the rails. Now push down a little on the wood and screw the wingnuts down. If your books have slippery covers and are sliding all over the place, you’ll probably need to make a few adjustments,square up the book columns, then make a few more adjustments, etc.
You may want to place some scrap paper or some already damaged books between the wood and the cover of your book, in order to avoid scratching your salable materials.
The key principle here is PRESSURE. Push down as hard as you can on the upper plank, and keep screwing in the wingnuts. When it feels like you can’t turn any more, stand on the upper plank. I promise, this will give you even more downward pressure. While you’re standing on the plank, make your last tightenings on the nuts.
HINT – if you notice the wood planks starting to bow, you may be applying too much pressure on the sides. Ease up a little, or try and clamp down harder on the center bolts to even it out.
The waiting game
How long do your books need to stay in the book press? That’s a good question. It will depend on a lot of circumstances, including the number of pages in your book, the type of paper, the amount of pressure you were able to apply, and atmospheric factors like temperature and humidity. I suggest at least several days to a week. If you like, you can leave the books in the press permanently, removing them only when you need to sell them.